If a link is not working well, there are a couple of things that users can try to solve the issue:
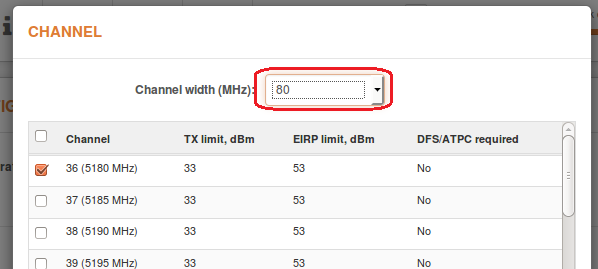
Solution #1. Try reducing the Channel Width. The LigoPTP RapidFire 5 has several options to choose from: 5, 10, 20, 40, and 80MHz; the LigoPTP RapidFire 4 has 5, 10, and 20MHz
All of the above can be done by navigating to Settings > Radio > Channel selection on the Master device.
Solution #2. If reducing the channel width does not help, the problem may be that there are too many other access points (APs) on the current channel.
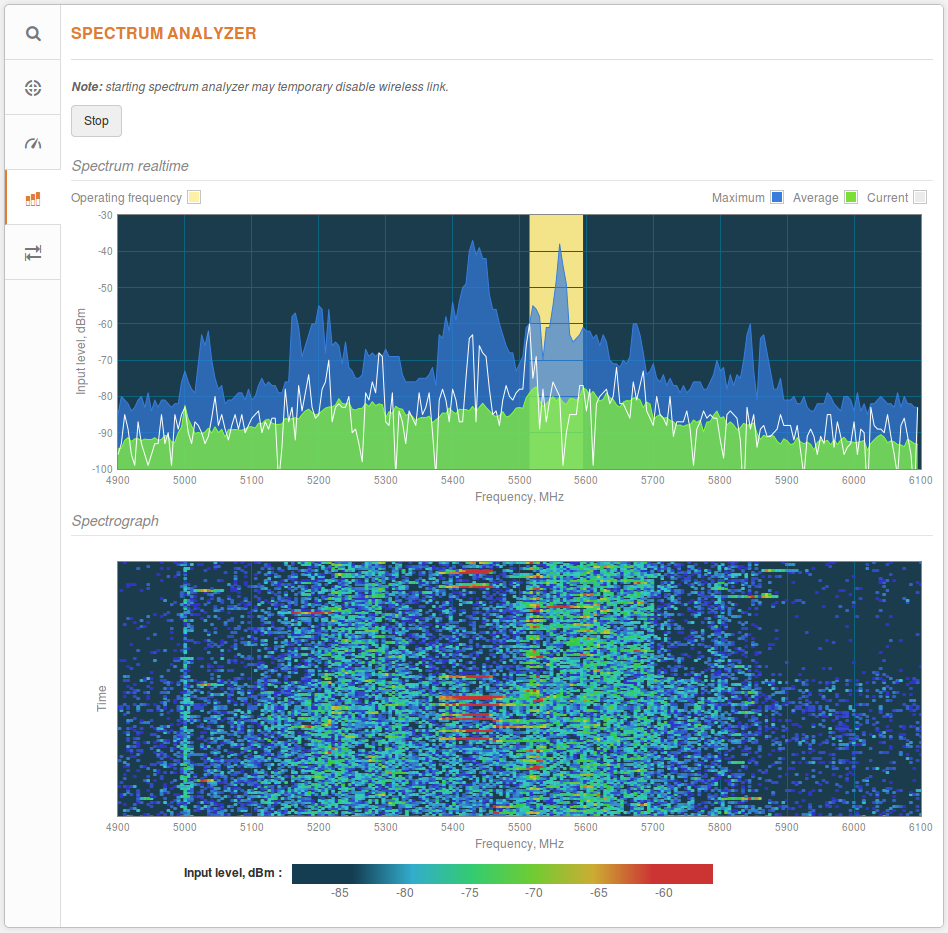
To look for a better channel, navigate to Tools > Spectrum Analyzer. Then click the Start button and wait for 20–۳۰ seconds while the radio gathers enough packets to present real-time noise.
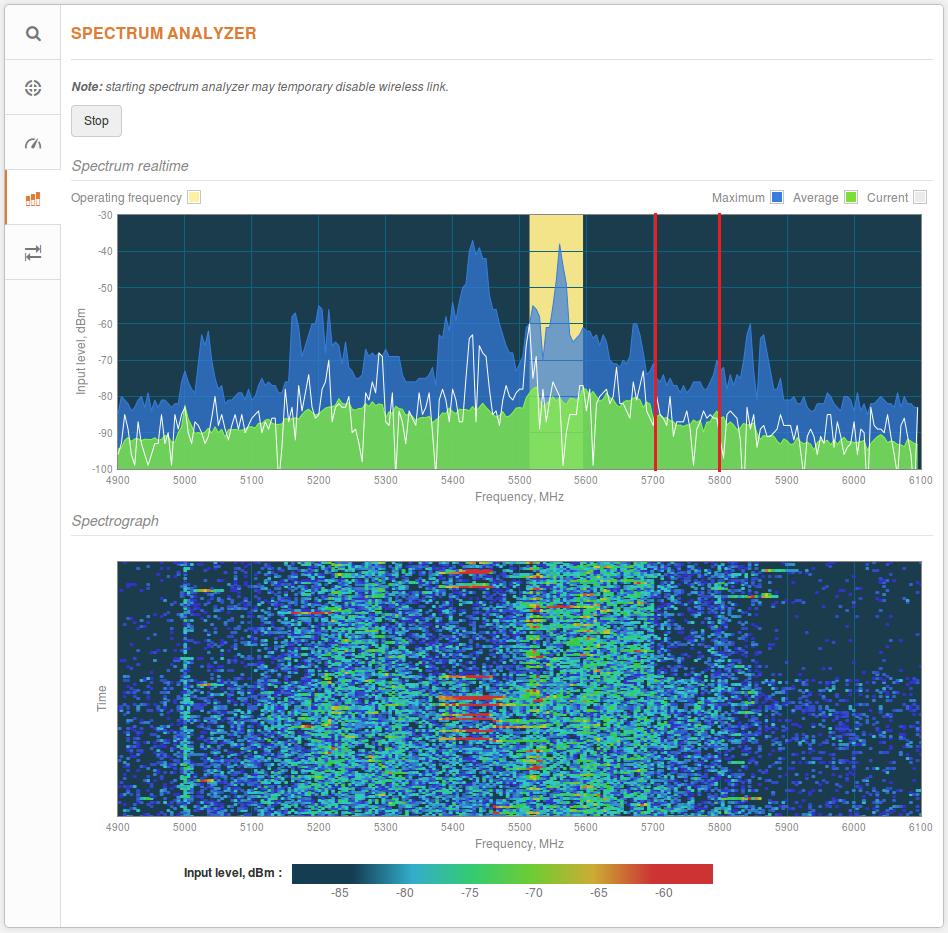
If the current channel coincides with a high peak in the graph, as shown above, it means that there is a lot of noise. Look for a frequency range where noise levels are the lowest. In the example below, ranges with lower noise levels are 5,300–۵,۳۸۰MHz and 5,700–۵,۷۸۰MHz.
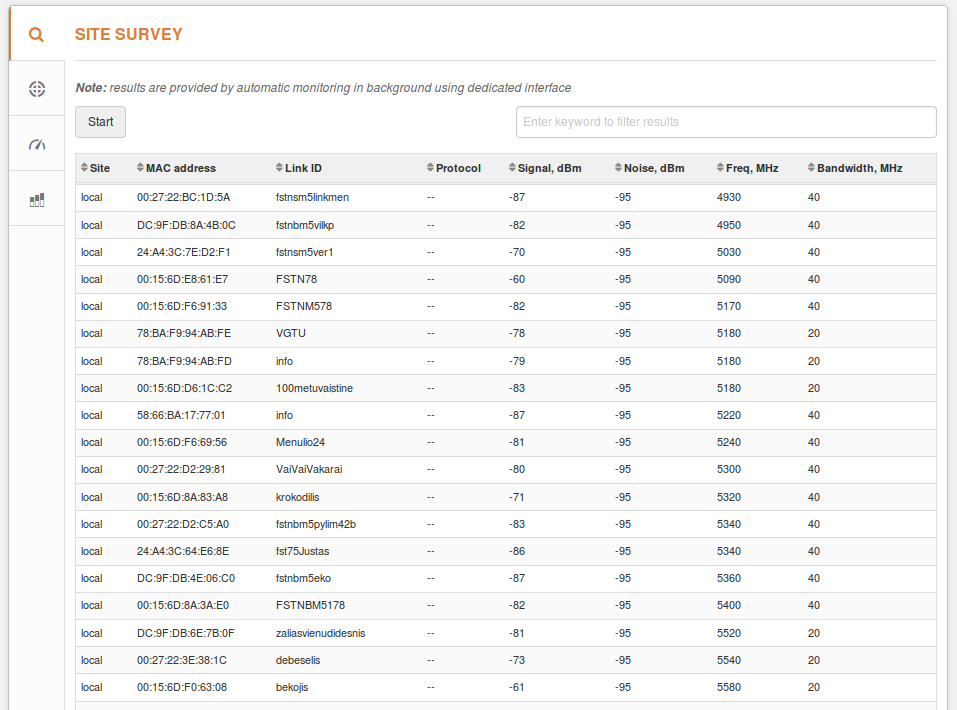
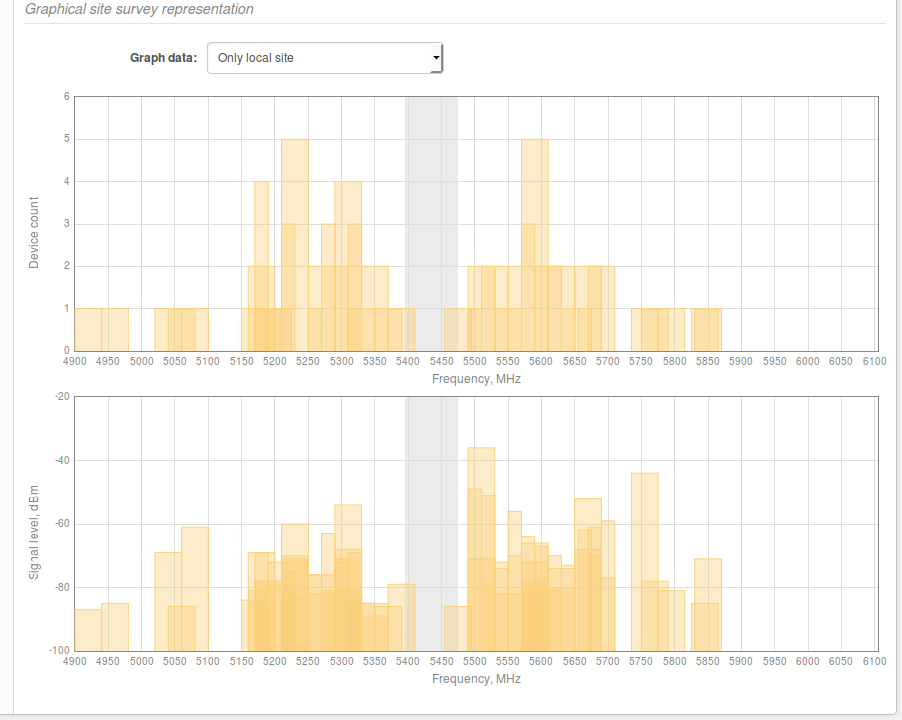
To find the right channel and to avoid collision with other APs, perform a scan in Tools > Site survey.
Choose a frequency that does not coincide with a frequency in the Site Survey’s Frequency column and which would be in a clean frequency range. Then, set it to operate as a Master device (Settings > Radio). Moreover, try to avoid frequencies with other devices operating on adjacent frequencies.
For example, the figure above shows that the 5,430MHz frequency does not have any devices working on it. However, there are nearby devices that are operating on the 5,300MHz and 5,500MHz frequencies, which might interfere with the user’s transmission, especially if the plan is to use an 80MHz channel width.
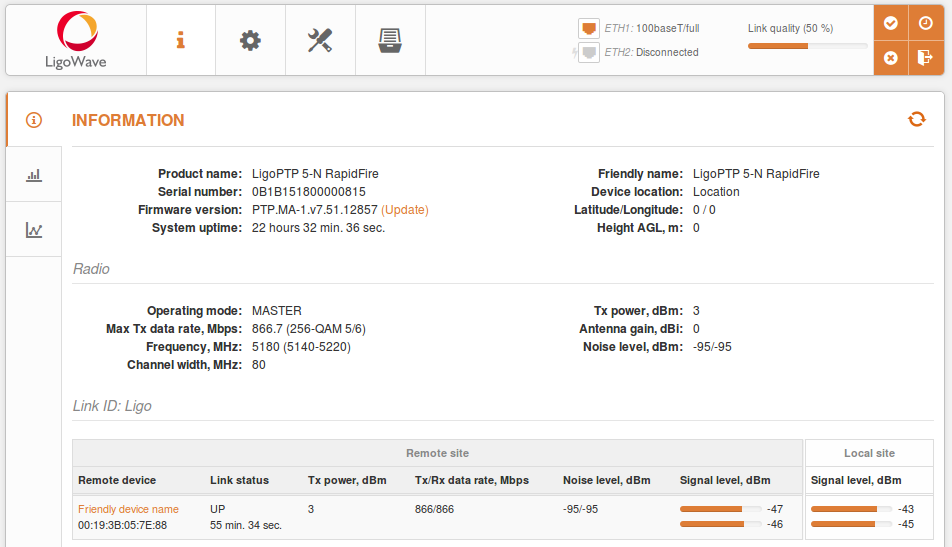
Once the link is established, use the Link Test speed tool to verify the Tx/Rx data rates and the total capacity of the link. If the results are not good enough, try another channel or reduce channel width. If the speed is sufficiently good, try to shift the current frequency up or down by 5MHz and check whether the throughput is greater.

